Link ID
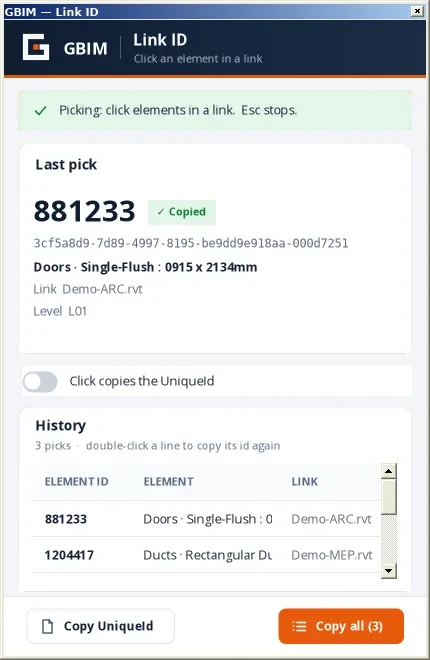
- GBIM ▸ View Tools ▸ Link ID. (Tip: give it a keyboard shortcut in Revit's Keyboard Shortcuts.)
- Click an element in any linked model. Its ElementId is on the clipboard at once; paste it where you need it.
- Keep clicking. Each click adds a line to the history; Copy all copies every ID, one per line, for Excel or Select by ID.
- Esc stops. Switch to UniqueId with Click copies the UniqueId.
Plan Box
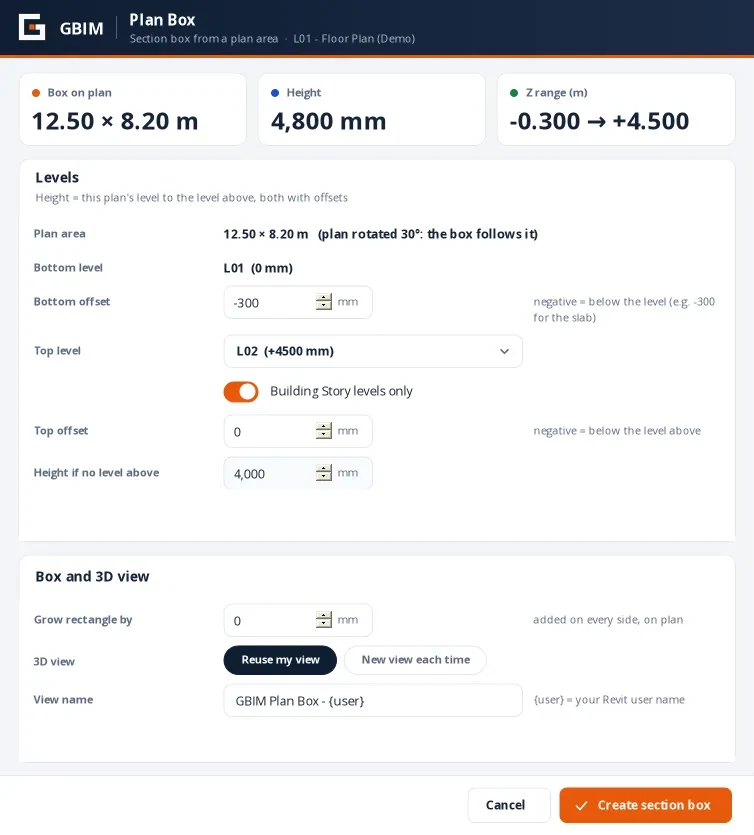
- Open a plan (floor, ceiling, structural or area plan) and click GBIM ▸ View Tools ▸ Plan Box.
- Drag a rectangle around the area.
- Confirm the heights: bottom offset (−300 mm takes the slab), the level above (Building Story levels only), top offset, height for the top floor, and how much to grow the rectangle.
- Create section box. A 3D view opens zoomed to the box; rotated plans give a rotated box.
Flag
GBIM ▸ Flag ▸ Flag, then click points on elements in the open view; press Esc to finish. A red GBIM Flag (a Generic Model, 1.5 m pole with a flag) is placed at each point in one Undo step, with GBIM flag <date> <user> in Comments. After the next NWC export, find them in Navisworks with Find Items (Family = GBIM Flag).
GBIM Export
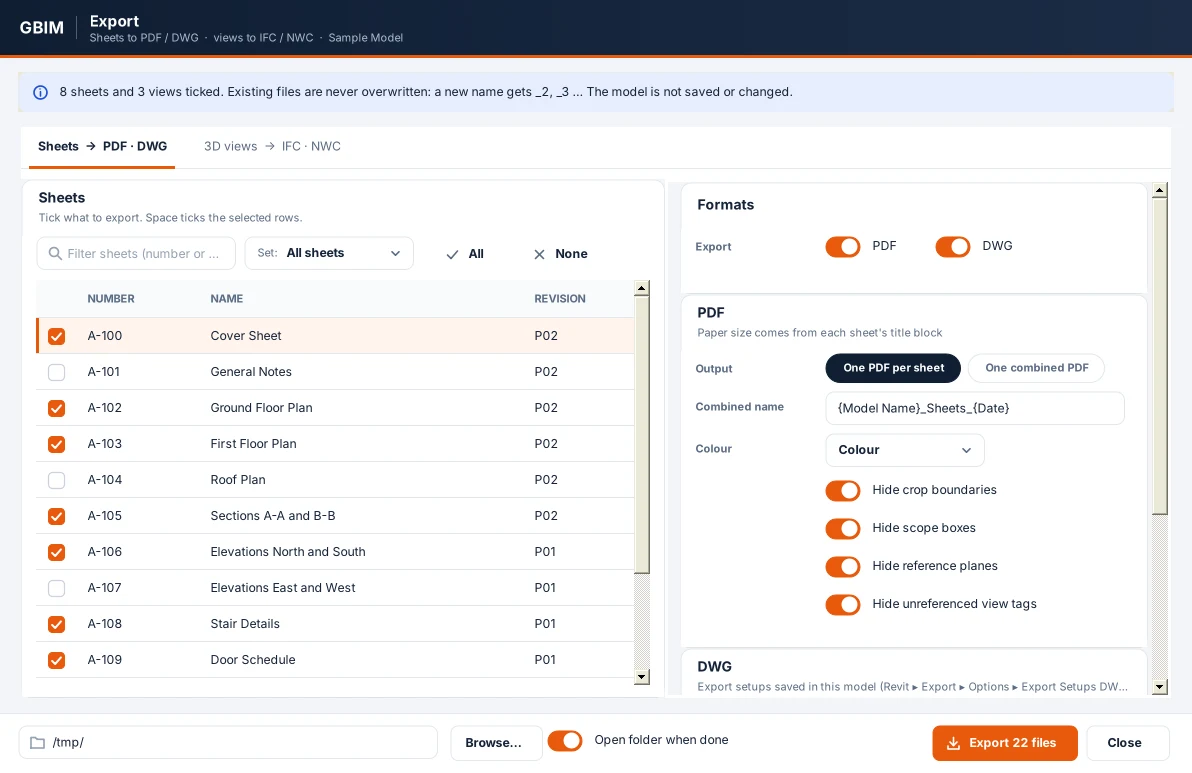
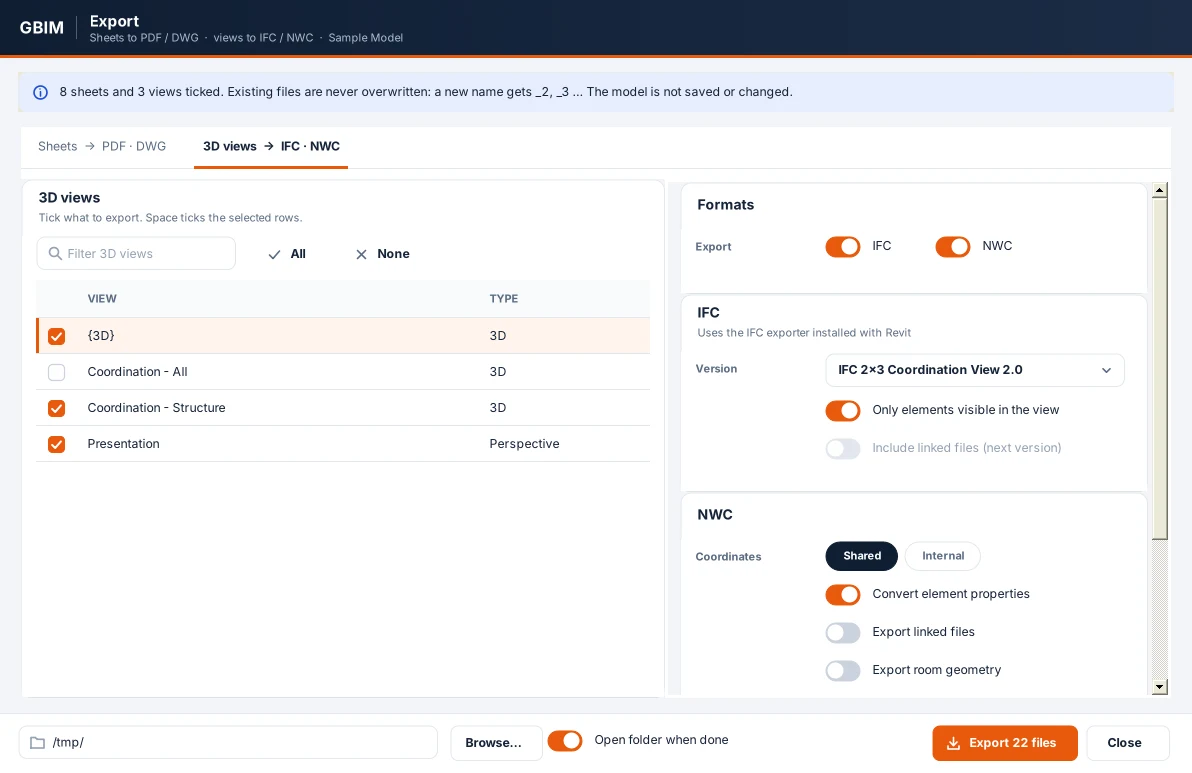
- GBIM ▸ Export ▸ Export. On Sheets, tick sheets or pick a sheet set; on 3D views, tick views.
- PDF: one file per sheet or one combined file; colour, grey or black; hide crop boundaries, scope boxes, reference planes and unreferenced tags. DWG: one of the model's DWG export setups.
- IFC: IFC 2x3 Coordination View 2.0, IFC4 Reference View or Design Transfer View, visible elements only. NWC: shared or internal coordinates, element properties, links, rooms, divide by levels.
- File names come from a pattern such as {Sheet Number}_{Sheet Name}_{Current Revision} or {Model Name}_{View Name}; any {Parameter Name} of the sheet, view or Project Information works.
- Export. A file that exists gets _2, _3…; each run writes a CSV log next to the files.